
The last few rounds of work on Cosmic: Alliance have involved staring at the same woman's face and trying to explain, as precisely as I can, why she still looks different from the drawing.
Her eyebrows were too uniform. Her hair looked like a bowl cut. Her eyes were too open for the calm expression in the concept art. After those changes, I kept coming back to the weight of her lower face and the angle of her nose.
The latest request was smaller again: round the two peaks of her upper lip and make her mouth a little wider.
This is Captain Aelar, the protagonist of the space exploration and survival game I introduced in my first Cosmic: Alliance post. I want the game to spend time on her face. She has to listen to her crew, consider what they have found and make decisions while something enormous waits outside the ship. The concept art already gives me a person I want to follow through that story. Getting her into 3D has taken quite a few corrections.
My estimate is that doing this stretch of refinement manually would have taken me a full day. With Astra, I have spent about an hour of active attention reviewing results and giving direction. Astra has also spent a couple of extra hours working behind the scenes on renders, rebuilds and checks. I have been able to step away while those happen.
Where the last post left her
Here is the actual model image from the previous post. I have kept that image intact so there is a clear record of the starting point.
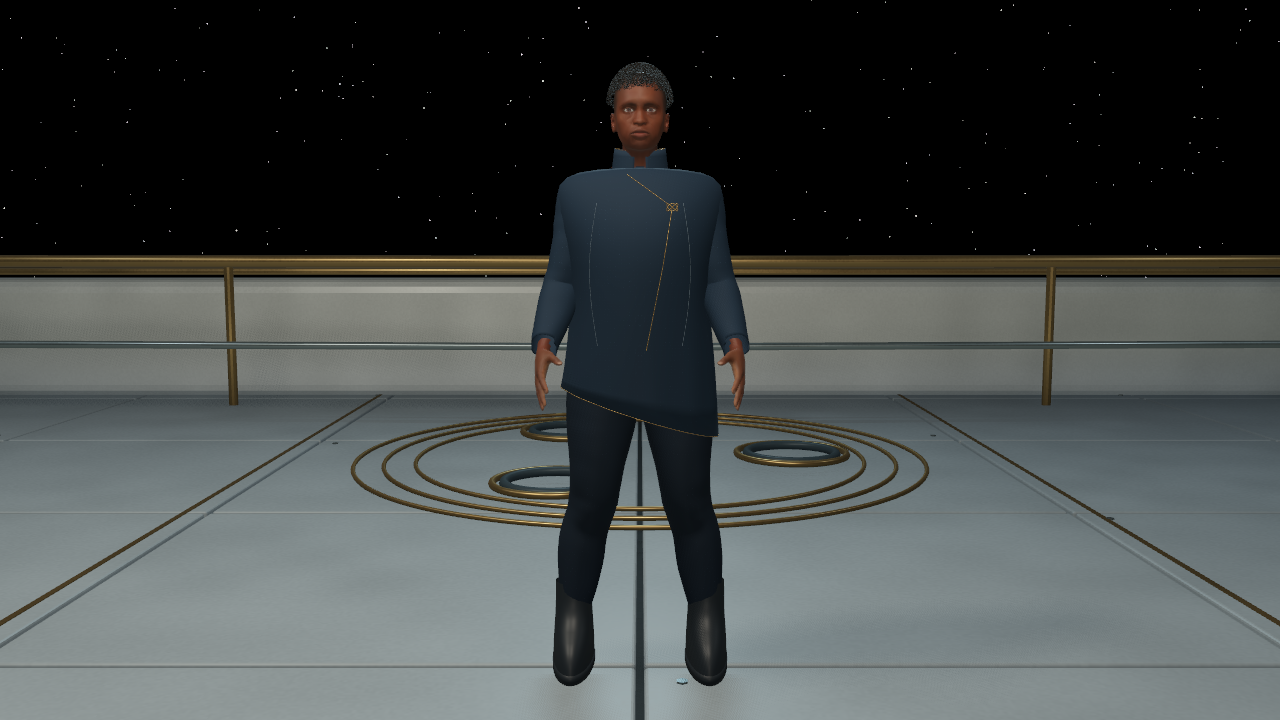
At that stage, I was pleased to have a working character aboard a working ship. The outfit, the rig and the environment were together in one scene. After the earlier experiments I wrote about in Crawl of the Forsaken, that was enough progress to get me excited.
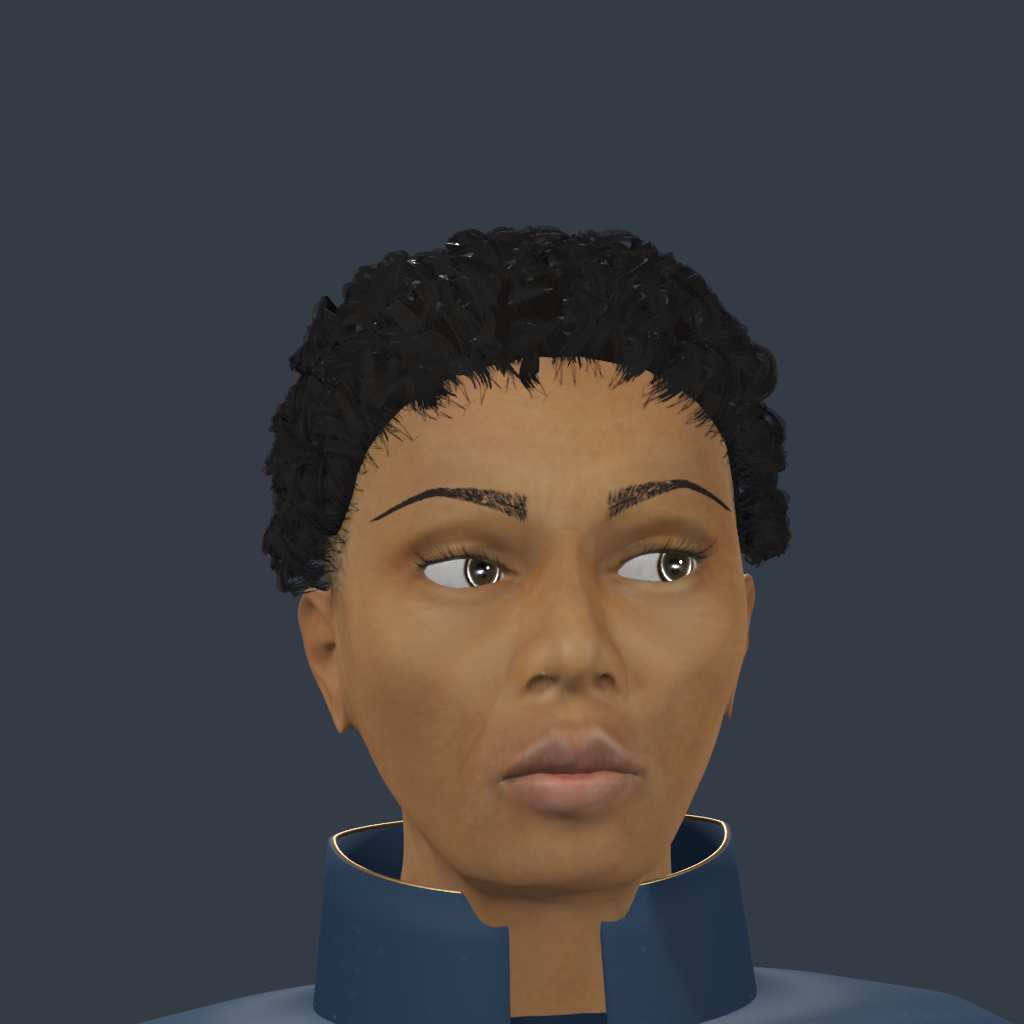
Once I started comparing Aelar herself with the concept, though, the differences were hard to ignore. Her body was too broad. Her complexion was too dark. Her head had the general parts of the design, but the proportions and expression gave me a different person.
The comparison below brings the old face closer and puts it beside the current model. The old screenshot contains relatively few pixels of her head, so enlarging it makes it soft. The new image comes from a dedicated close-up in Godot. These also use different lighting and poses, so this pair shows the overall progress rather than isolating any one material change.
Learning to describe the difference
My first requests were fairly broad: bring her closer to the concept, give her eyes some life, make the lower face less heavy. Those were useful directions, but they left a lot for Astra to interpret. As the model improved, I needed to get more specific.
The concept has a calm gaze. Her upper lids cover more of her eyes, and the shape above them is rounded. In the model, the heavy brow ridge made her expression look harsher than I intended. Asking for calmer eyes led us into several separate pieces of work: the lids, the socket contour, the eyebrows and eventually the direction of her gaze.
The eyebrows were particularly revealing. In the drawing, they are fuller near the center and taper toward the outside, with a raised, slightly pointed arch. The generic brows on the early model changed her expression even when the eyes themselves were close. A few millimeters of shape could make her seem tense when I wanted her to look composed.
The lashes helped too. I wanted them to be visible, especially toward the outer corners, without turning her expression into a wide-eyed stare. After those were added and refined, the upper half of her face began to feel much closer. They also had to move with the lids. A good resting pose would have been a poor trade if blinking pulled the lashes away from the eye.
Hair took its own sequence of corrections. Aelar's curls should frame her whole head, leave her forehead clear and sit around her visible ears. The early groom looked too much like a cap. As the curls gained the right silhouette, the exposed forehead and head shape became easier to judge. Fixing the hair uncovered another proportion problem that the old hairstyle had partly hidden.
Putting the drawing over the model
Eventually I asked for an overlay. I wanted to see where the outlines diverged instead of trying to remember the drawing while looking at a separate render.
That comparison is only useful if the pose is reasonably close. The concept portrait has a slight turn and a sideways gaze. A straight-on model with its eyes looking forward can seem wrong for reasons that have little to do with the sculpt. We adjusted the review pose, aligned the images around the eyes and compared the lower face again.
Here is the reference beside the current result in that review pose. The illustration is enlarged uniformly. The model image is an engine capture, with no generated detail painted over it.
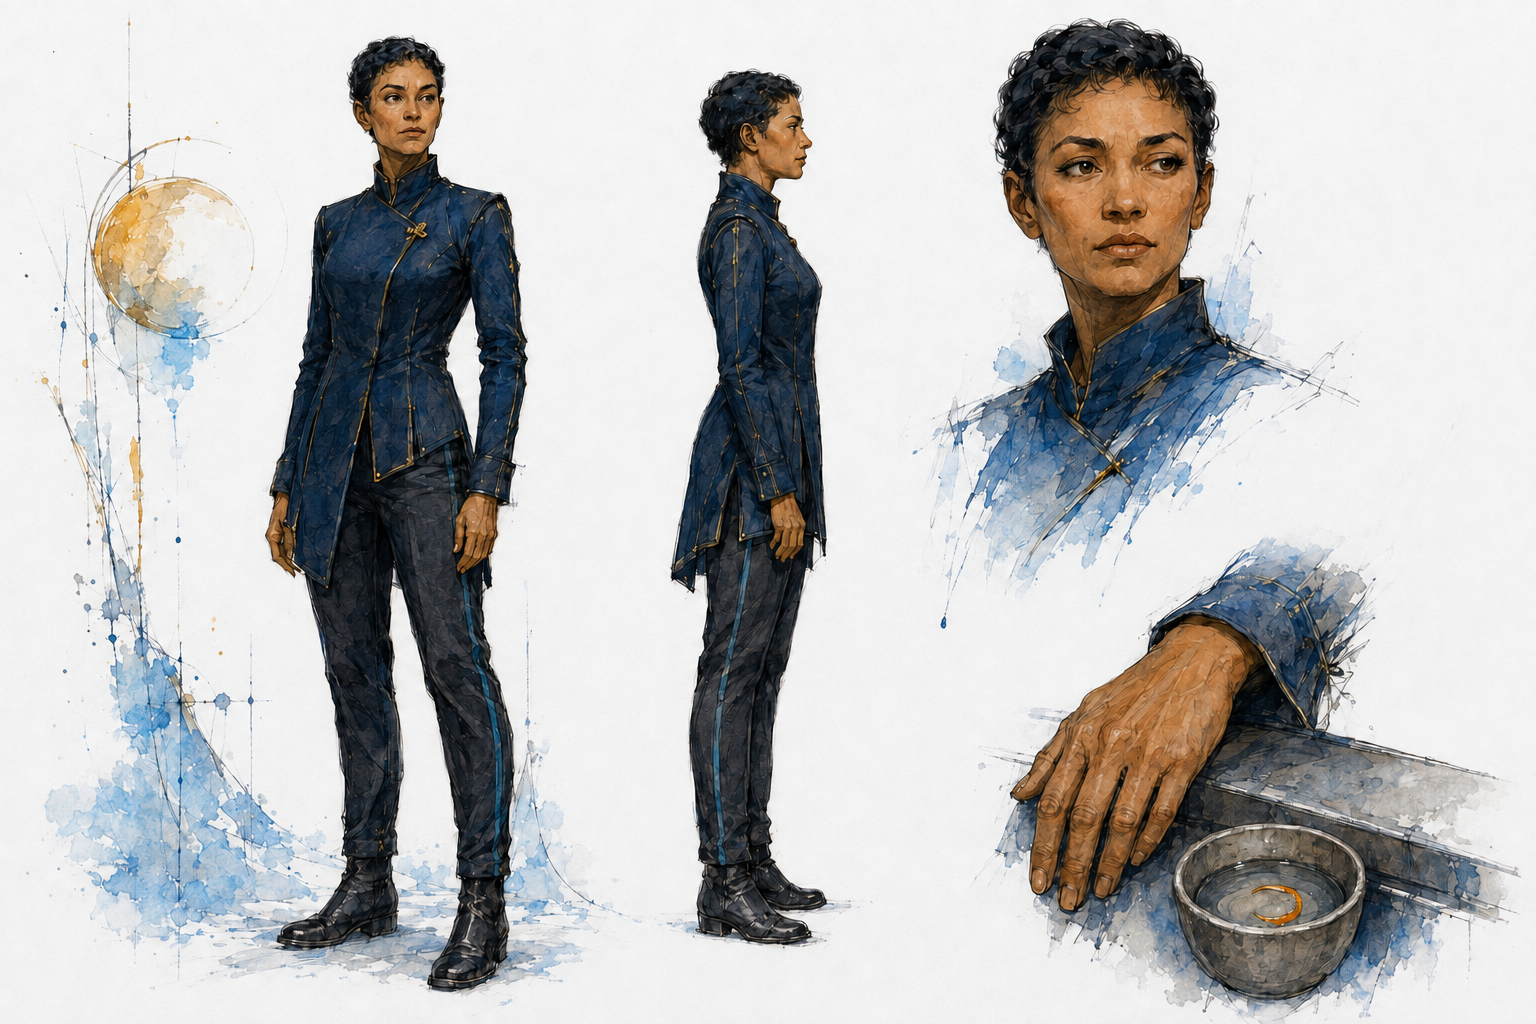
The jaw was one of the clearest differences. The model's lower face projected too far and carried too much weight down the sides. I wanted the jaw to flatten sooner and turn into a shallower, rounded chin. Seeing the outlines together gave me a much better way to explain that than another request to soften the face.
The nose was stubborn. We narrowed the upper bridge, then worked on the tip, its upward angle and the amount of nostril visible from the front. It took more than one attempt. Later I asked for a slightly narrower nose and rounder nostrils. Those requests sound almost trivial in a sentence; in a close-up, they affect how the whole face reads.
The mouth went through the same process. First I wanted a narrower shape with two distinct peaks in the upper lip. With the rest of the face closer, those peaks looked too sharp and the mouth a little too compact. The latest pass rounds them and adds a small amount of width. I am comfortable revising an earlier request when the next image gives me a better view of the problem.
Skin needs more than a color correction
The complexion started with a straightforward mismatch: I wanted the olive tones in the concept. Once the color moved closer, the shine became more distracting. Broad highlights made the face look smoother and slicker than I wanted.
Astra adjusted the skin's response to light as well as its color. The current material has more variation in roughness, fine pore relief and subtle pigment variation, with separate treatment around the lips. That gives the light more surface information to work with. We reviewed the result under fixed lighting so a lighting change could not do all the work of making the skin appear better.
The close-up still exposes softness in the underlying skin detail, and the hair and eyes need further work. In a conversation, lighting and movement will give me more to judge than this portrait can. I want to spend time watching her listen and speak before deciding how well the face holds up.
What happened while I was away from the keyboard
Astra has been doing the Blender work: editing the sculpting scripts, fitting the groom and facial details, maintaining the rig and shape keys, updating materials and exporting the character back into Godot. It then captures the result for review. The source still uses the CC0 MakeHuman base geometry, rig and skin inputs credited in the first post. The current face is the result of adapting those inputs and repeatedly refining the authored asset.
Some checks are less interesting to look at than a portrait, but they matter. The mouth needs to hold together when the jaw opens. Eyelashes need to follow a blink. The character needs to remain usable in the bridge scene after a face rebuild. Reviewing a front view, a profile and an expression can expose a change that looked successful from only one angle.
That background work accounts for the extra hours I mentioned earlier. I would review an image, describe the next correction and leave Astra to carry it through the build and screenshot cycle. My hour or so was spread across those decisions. The full day of manual work is my own estimate of what this would have taken me, rather than a timed comparison with a professional character artist.
What surprised me was how much of that attention I could spend looking. In my earlier procedural creature experiments, I spent a lot of effort finding a construction method that would produce a usable shape at all. Here I could spend several rounds on the precise curve of an eyelid. Having the underlying model, rig and export process already working made those smaller decisions practical.
I still had to make them. Astra could inspect screenshots and catch problems, but my sense of who Aelar should be kept guiding the next request. Sometimes the correction was hard to articulate. Sometimes the result showed that I had asked for too much. Keeping the reference and the previous render available made it easier to change course without losing track of what had improved.
Aelar is now much closer to the captain I saw in the concept. The next useful test is to spend more time with this face in a scene: listening, blinking, turning toward another crew member and speaking. I want to find out which of these carefully judged shapes survive a performance, and which ones send me back to the next close-up with another small correction.